Dreamcast Controller
From Sega Retro
As it is with other systems, the Dreamcast Controller is the primary user interface for the Sega Dreamcast. The standard Dreamcast controller has 11 buttons plus an analog joystick. The buttons include:
- four buttons arranged as a directional pad on the top left
- Start button in the top middle
- four action buttons on the top right
- one analog trigger on the front left
- one analog trigger on the front right
- analog joystick on the top left
However, unlike most controllers, the Dreamcast controller has two expansion slots on the top. The one in front houses the VMU; the one in back houses other expansions such as the Jump Pack, a force feedback, or "rumble," pack.
Inside a Dreamcast controller
Although each button can be configured to perform a specific and distinctive action, all of the buttons, except for the two analog triggers and joystick, work on the same principle. In essence, each button is a switch that completes a circuit whenever it is pressed. A small metal disk beneath the button is pushed into contact with two strips of conductive material on the circuit board inside the controller. While the metal disk is in contact, it conducts electricity between the two strips. The controller senses that the circuit is closed and sends that data to the Dreamcast. The CPU compares that data with the instructions in the game software for that button, and triggers the appropriate response. There is also a metal disk under each arm of the directional pad. If you're playing a game in which pushing down on the directional pad causes the character to crouch, a similar string of connections is made from the time of the push down on the pad to when the character crouches.
The analog joystick and triggers work in a completely different way from the buttons described above. The triggers each have a tiny magnet attached to the end of the trigger arm. When the trigger is depressed, the magnet is pushed toward a sensor mounted on the controller's circuit board. Through the process of induction, the magnet creates resistance to the current passing through the sensor. On the bottom of the magnet is a layer of foam padding. Pushing harder on the trigger compresses the padding, which brings the magnet closer to the sensor. The closer the magnet is to the sensor, the more resistance is induced. This variable resistance makes the triggers pressure-sensitive!
The joystick also uses a magnet, along with four small sensors. The sensors are arranged like a compass, with one at each of the cardinal points (north, south, east, west). The base of the joystick is shaped like a ball, with tiny spokes radiating out. The ball sits in a socket above the sensors. Spikes on the socket fit between the spokes on the ball. This allows for an extraordinary amount of movement without letting the joystick twist out of alignment with the sensors. As the joystick is moved, the magnet in the base moves closer to one or two of the sensors, and farther from the others. The system monitors the changes in induction caused by the magnet's movement to calculate the position of the joystick.
The controller has two expansion ports where memory cards, tremor packs, Visual Memory System (VMS) devices and other system additions can be inserted.
A popular option is the tremor pack, which provides force feedback. This feature provides a tactile stimulation to certain actions in a game. For example, in a racing game, you might feel a jarring vibration as your car slams into the wall. Force feedback is actually accomplished through the use of a very common device, a simple electric motor. The shaft of the motor holds an unbalanced weight. When power is supplied to the motor, it spins the weight. Because the weight is unbalanced, the motor tries to wobble. But since the motor is securely mounted inside the tremor pack, the wobble translates into a shuddering vibration of the controller itself.
Box Scans

US box (front)
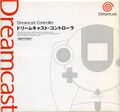
JP box (front)
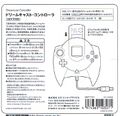
JP box (back)


