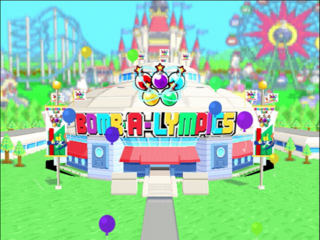
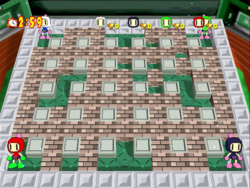
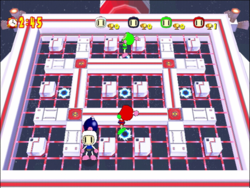
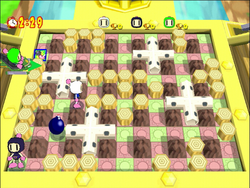
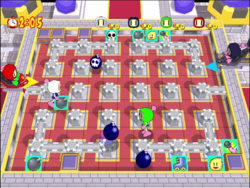
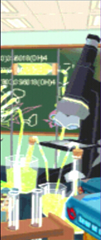
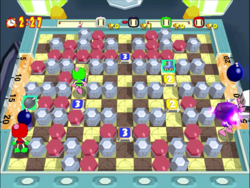
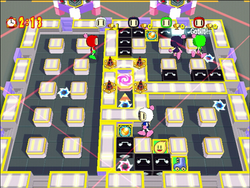
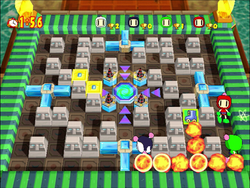
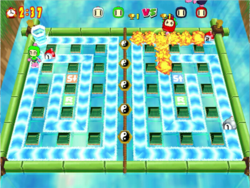
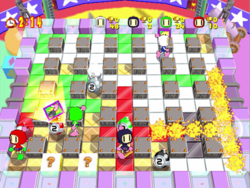
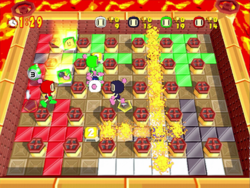
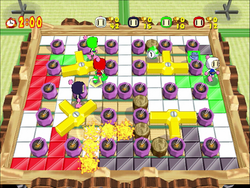
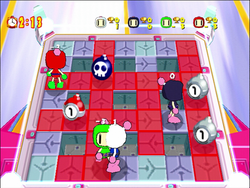
Bomberman Online features a number of multiplayer stages. While Survival Rule features eight stages, all the other rules offer three stages. Every stage features three variations, Beginner, Normal and Advanced. Each variation features changes in level layouts, gimmicks, and starting power ups. Below is a complete list of stages detailing the differences of each stage and difficulty.
Battle Game Stages
Survival Rule
|
| Survival rule acts in traditional Bomberman gameplay. The last standing player wins the match.
|

|
Stadium of Kings
|
No gimmicks appear in this stage, a more traditional Bomberman stage.
- Beginner - Normal arrangement of hard and soft blocks.
Player Stats: Bomb: +1 Fire: +2
- Normal - Similar to Beginner arrangement.
Player Stats: Bomb: +1 Fire: +2
- Advanced - More hardblocks obstruct pathways leaving fewer pocket corners and more corridor-like areas.
Player Stats: Bomb: +1 Fire: +2
|

|
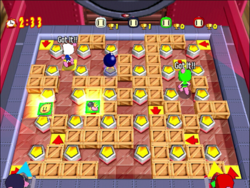
Arrow Train
|
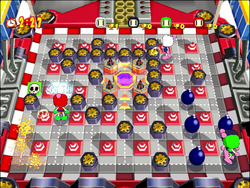
If a bomb is kicked over a yellow-colored arrow panel, it will change direction depending on the arrow blocks it runs over on the floor. Black-colored arrow panels will change direction clockwise and act similarly.
- Beginner - Yellow-colored arrow panels appear on the playfield.
Player Stats: Bomb: +1 Fire: +2
- Normal - Yellow-colored arrow panels and a few black-colored arrow panels are added into the playfield.
Player Stats: Bomb: +1 Fire: +2
- Advanced - Only black-colored arrow panels appear on the playfield. In the center is a button when walked over will change their rotation.
Player Stats: Bomb: +1 Fire: +2
|

|
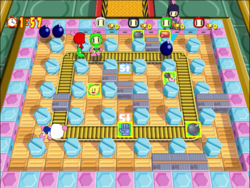
Conveyer Belt Factory
|
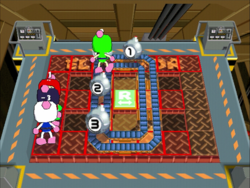
A conveyer belt in the middle of the playfield will move both players and bombs automatically.
- Beginner - The conveyer belt circles the playfield.
Player Stats: Bomb: +1 Fire: +2
- Normal - The conveyer belt circles the playfield. Two panels on north and south ends inside the belt's loop changes its speed in three settings. The northern panel speeds up the belt and the southern panel slows the belt down. In the middle is a reverse panel when stepped on, changes the direction of the belt.
Player Stats: Bomb: +1 Fire: +2
- Advanced - No softblocks appear. Only two conveyer belts and a reverse panel when stepped on, changes the direction of the belts.
Player Stats: Bomb: +6 Fire: +6 Speed: +3
|

|
Cosmic Warp
|
Warp panels on the ground will transport players to a different point on the map
- Beginner - Four warp panels will place you on an adjacent warp panel clockwise. A red-colored warp in the middle will warp players to random warp panels on the map.
Player Stats: Bomb: +1 Fire: +2
- Normal - A horizontal hardblock cuts most of the play field in half, giving access to either side by either the edge of the map or two warp panels on the north and south ends.
Player Stats: Bomb: +1 Fire: +2
- Advanced - Five warp panels separate between the inner and outer portions of the map. No softblocks appear on the playfield.
Player Stats: Bomb: +4 Fire: +6 Speed: +3
|

|
Jurassic Pipe
|
Players can hide under pipes and lay bombs to trick unsuspecting opponents.
- Beginner - Four cross pipes appear on the four corners of the playfield.
Player Stats: Bomb: +1 Fire: +2
- Normal - A double cross pipe appears in the center while four T-shaped pipes rest on the edges of the playfield.
Player Stats: Bomb: +1 Fire: +2
- Advanced - Double T-shaped pipes appear on the north and south ends of the playfield while two separate T-shaped pipes appear on the sides.
Player Stats: Bomb: +1 Fire: +2
|

|
Bomb-Bomb Castle
|
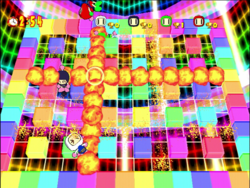
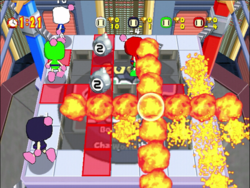
A bomb will fall out of the sky and will blow up entire rows and destroy softblocks, items and players.
- Beginner - Standard stage arrangement of hard and soft blocks.
Player Stats: Bomb: +1 Fire: +2
- Normal - Horizontal hard blocks obstruct certain pathways.
Player Stats: Bomb: +1 Fire: +2
- Advanced - The environment is split between a central area and two walkways on the north and south ends.
Player Stats: Bomb: +1 Fire: +2
|

|
Chemical Lab
|
Numbered panels count down when there is an explosion over it. Once it reaches zero, it emits a lined explosion based on it's position.
- Beginner - Explosion panels appear on north and south ends of the playfield.
Player Stats: Bomb: +1 Fire: +2
- Normal - Two sets of two explosion panels appear on north and south ends of the playfield.
Player Stats: Bomb: +1 Fire: +2
- Advanced - Four sets of explosion panels appear on the playfield. Sets of two appear on the west and east ends while one appears from the north and one from the south.
Player Stats: Bomb: +1 Fire: +2
|

|
Miracle World
|
This stage lacks softblocks and instead grants all players with a number of power ups.
- Beginner - Standard arrangement of hardblocks appears on the playfield
Player Stats: Bomb: +6 Fire: +6 Speed: +3
- Normal - Same as above with the ability to kick bombs added.
Player Stats: Bomb: +6 Fire: +6 Speed: +3 Kick: +1
- Advanced - Same as above with the ability to grab/throw and punch bombs added.
Player Stats: Bomb: +6 Fire: +6 Speed: +3 Kick: +1 Power Glove: +1 Punch: +1
|
Hyper Bomber Rule
|
| Collect three target panels and touch the center gate to win. Defeat will cause players to lose all their items and will respawn.
|

|
Hyper Circuit
|
No gimmicks appear in this stage. Succeeding difficulties add more hard blocks
- Beginner - Standard stage arrangement.
Player Stats: Bomb: +1 Fire: +2
- Normal - Hardblock arrangement splits the playfield with an inner loops and pocketed areas in the outer area.
Player Stats: Bomb: +1 Fire: +2
- Advanced - Inner loop provides connectivity to eight pocketed areas in outer areas with hard blocks in the north, south, west and east ends.
Player Stats: Bomb: +1 Fire: +2
|

|
High Tech Building
|
Warp panels will warp you to the adjacent panel clockwise.
- Beginner - Four warp panels appear in the four corners of the playfield.
Player Stats: Bomb: +1 Fire: +2
- Normal - The playfield is split into three areas. Two sets of warp panels appear on the west and east ends with the middle featuring a random warp panel in the middle and the gate in the northern area.
Player Stats: Bomb: +1 Fire: +2
- Advanced - The playfield is split into four areas. The center being the central gate, the left side being split vertically and the right side split into two tight horizontal spaces. The only access between then is the warps in the middle of each one.
Player Stats: Bomb: +1 Fire: +2
|

|
Whirling Catacomb
|
Movable barriers will block passages making it difficult to get to the center gate.
- Beginner - Two T-shaped barriers can move into one of two positions. They can block or provide access to the west and east access to the gate.
Player Stats: Bomb: +1 Fire: +2
- Normal - Two T-shaped barriers can move into one of two positions. They can block or provide access to the north and south access to the gate.
Player Stats: Bomb: +1 Fire: +2
- Advanced - The playarea is split between an inner and outer loop. With access blocked off by four T-shaped barriers that can be moved to one of two positions.
Player Stats: Bomb: +1 Fire: +2
|
Submarine Rule
|
| Plant bombs to have them appear on your opponent's side of the stage. This game mode is only available in Team Play.
|

|
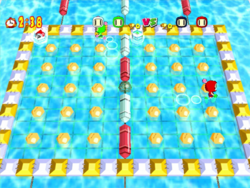
Swimming Pool
|
No gimmicks appear in this stage. Succeeding difficulty levels add more hardblocks.
- Beginner - Standard playfield arrangement.
Player Stats: Bomb: +3 Fire: +3 Speed: +2
- Normal - Stage is split horizontally which has two different areas.
Player Stats: Bomb: +3 Fire: +3 Speed: +2
- Advanced - Playfield is split with a circular path with four corners.
Player Stats: Bomb: +3 Fire: +3 Speed: +2
|

|
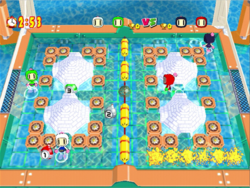
Arctic Sea Salvage Ship
|
Igloos cover up areas of the map which can hide players and bombs.
- Beginner - Team Cool's igloo appears in the bottom right corner while Team Heat's igloo appears in the upper left corner.
Player Stats: Bomb: +3 Fire: +3 Speed: +2
- Normal - Both igloos appear in the middle of both team's playfields.
Player Stats: Bomb: +3 Fire: +3 Speed: +2
- Advanced - Two igloos appear in the middle of both ends of the playfield.
Player Stats: Bomb: +3 Fire: +3 Speed: +2
|

|
Oriental Falls
|
Water paths will act similarly to conveyer belts which moves players and bombs automatically.
- Beginner - A riverpath will circle the center of both playfields.
Player Stats: Bomb: +3 Fire: +3 Speed: +2
- Normal - Team Cool's playfield has a button to speed up both riverbanks, Team Heat's playfield has a button to slow them down, and both teams have a button to reverse them.
Player Stats: Bomb: +3 Fire: +3 Speed: +2
- Advanced - Team Cool can slow down the riverbank wile Team Heat can speed it up, both can reverse the path. Both playfields feature a spiraling riverbank path.
Player Stats: Bomb: +3 Fire: +3 Speed: +2
|
Panel Paint Rule
|
| Use bombs to turn panels on the field to your color. Most panels wins. Players can respawn once defeated, but all panels in their color will disappear and will lose all items.
|

|
Colorful Circus
|
No additional gimmicks appear on stage. Each succeeding difficulty curve adds more hardblocks.
- Beginner - Standard stage layout.
Player Stats: Bomb: +2 Fire: +2
- Normal - On Northwest and Southeast ends of the playfield are L shaped hardblocks creating more corridor-like areas.
Player Stats: Bomb: +2 Fire: +2
- Advanced - Area has a split of an outer and inner area of the playfield.
Player Stats: Bomb: +2 Fire: +2
|

|
Blast Furnace
|
Explosive panels appear in the field. The player who triggers it's explosion claims the panels the path covers.
- Beginner - Explosive panels appear on the north and south ends of the stage.
Player Stats: Bomb: +2 Fire: +2
- Normal - Two sets of two explosive panels appear on north and south ends of the stage.
Player Stats: Bomb: +2 Fire: +2
- Advanced - Four explosive panels appear on the North, South, West and East and in the middle of the playfield.
Player Stats: Bomb: +2 Fire: +2
|

|
Ninja House
|
Movable barriers will block paths through the stage. In addition the barriers cannot be moved if they are obstructed by other players or bombs.
- Beginner - Two T-shaped barriers appear on the left and right sides of the playfield.
Player Stats: Bomb: +2 Fire: +2
- Normal - Three line barriers occupy the horizontal space of the playfield.
Player Stats: Bomb: +2 Fire: +2
- Advanced - Four T-shaped barriers appear in the four corners of the playfield.
Player Stats: Bomb: +2 Fire: +2
|
Ring Match Rule
|
| Use bombs to blow off players from the arena for points. Players will respawn afterward. The player with the most points wins.
|

|
Extreme Bout Arena
|
No gimmicks or obstructions appear on the stage.
- Beginner - A small, tight area with no walls
Player Stats: Bomb: +3 Fire: +3 Speed: +1
- Normal - A slightly more open arena.
Player Stats: Bomb: +3 Fire: +3 Speed: +1
- Advanced - North and south sections of the playfield are split by a central pathway.
Player Stats: Bomb: +3 Fire: +3 Speed: +1
|

|
Reverse Lift
|
Conveyer belts appear on the stage with a reverse switch in the middle. When pressed, the conveyer belt will change to the reverse direction.
- Beginner - One horizontal belt appears in the middle of the playfield.
Player Stats: Bomb: +3 Fire: +3 Speed: +1
- Normal - Two vertical belts appear in the middle of the playfield.
Player Stats: Bomb: +3 Fire: +3 Speed: +1
- Advanced - A belt circles the middle of the playfield.
Player Stats: Bomb: +3 Fire: +3 Speed: +1
|

|
Independence Bomb
|
A bomb will fall from the sky that explodes on both ends of it's position on the playfield. A timer does not appear on the face of the bomb.
- Beginner - A tight corridor stage.
Player Stats: Bomb: +3 Fire: +3 Speed: +1
- Normal - Provides more vertical access in the paths.
Player Stats: Bomb: +3 Fire: +3 Speed: +1
- Advanced - Provides more horizontal access in the paths.
Player Stats: Bomb: +3 Fire: +3 Speed: +1
|
