Difference between revisions of "Popful Mail"
From Sega Retro
(accidentally nuked the article, hopefully this fixes it) |
m |
||
| (26 intermediate revisions by 5 users not shown) | |||
| Line 6: | Line 6: | ||
| publisher=[[Sega]] | | publisher=[[Sega]] | ||
| developer=[[Sega Falcom]], [[Working Designs]] | | developer=[[Sega Falcom]], [[Working Designs]] | ||
| + | | licensor=[[Nihon Falcom]] | ||
| system=[[Sega Mega-CD]] | | system=[[Sega Mega-CD]] | ||
| sounddriver= | | sounddriver= | ||
| Line 11: | Line 12: | ||
| players=1 | | players=1 | ||
| genre=Action{{fileref|PopfulMail MCD JP Box Back.jpg}}{{ref|https://web.archive.org/web/20200622192404/https://sega.jp/history/hard/mega-cd/software.html}} | | genre=Action{{fileref|PopfulMail MCD JP Box Back.jpg}}{{ref|https://web.archive.org/web/20200622192404/https://sega.jp/history/hard/mega-cd/software.html}} | ||
| − | |||
| originaldevelopers=[[Falcom]] | | originaldevelopers=[[Falcom]] | ||
| originalsystem=PC-8801 | | originalsystem=PC-8801 | ||
| Line 22: | Line 22: | ||
| mcd_rating_us=ka | | mcd_rating_us=ka | ||
}} | }} | ||
| − | | otherformats={{NonSega|SNES}} | + | | otherformats={{NonSega|PC8801mkIISR|PC9801VM|SCDROM2|SNES}} |
}} | }} | ||
| − | '''''{{PAGENAME}}''''' (ぽっぷるメイル) is | + | '''''{{PAGENAME}}''''' (ぽっぷるメイル) is platform game, originally developed by [[Falcom]] for the [[PC-88]] in 1991. It was ported to the [[Sega Mega-CD]] by [[Sega Falcom]] in 1994. A demo disc, called ''[[Popful Mail Taikenban]]'', was also released. |
| − | + | Sega of America originally intended to localize the game as ''[[Sister Sonic]]'' but abandoned this plan after receiving negative feedback. Ultimately, it was given to [[Working Designs]] to localize. | |
==Story== | ==Story== | ||
| + | {{ScreenThumb|Popful Mail, Introduction.png|width=200|Masters of Evil}} | ||
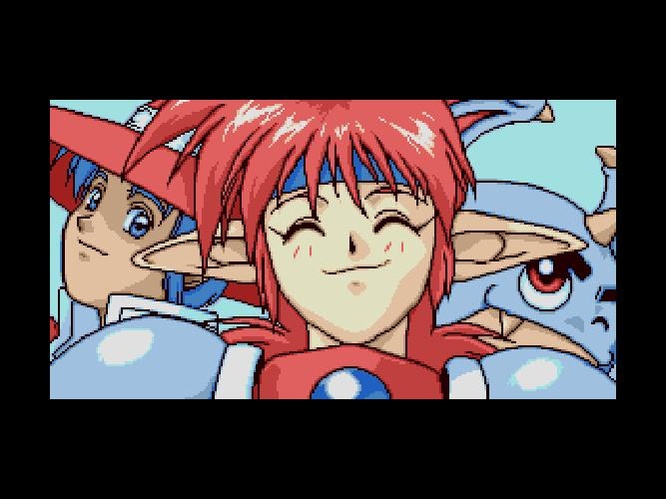
The story is set in an unnamed fantasy world where, long ago, three fallen gods of darkness known as the Masters of Evil attempted to lay siege to the mortal plane. They were known as Morgal, the Lord of Beasts, commander of the feral and the most voracious of monsters and beasts; Necros, the Master of War, corruptor of men and the inciter of temptation and vice; and Ulgar, the Overlord, the leader of the Masters of Evil and wielder of the most evil of magics. At the end of the great war that threatened all who lived in it, the Masters of Evil were sealed away in a floating tower far from the reach of anyone, and only three warriors, an elf, a human, and a dwarf, survived to tell the tale. | The story is set in an unnamed fantasy world where, long ago, three fallen gods of darkness known as the Masters of Evil attempted to lay siege to the mortal plane. They were known as Morgal, the Lord of Beasts, commander of the feral and the most voracious of monsters and beasts; Necros, the Master of War, corruptor of men and the inciter of temptation and vice; and Ulgar, the Overlord, the leader of the Masters of Evil and wielder of the most evil of magics. At the end of the great war that threatened all who lived in it, the Masters of Evil were sealed away in a floating tower far from the reach of anyone, and only three warriors, an elf, a human, and a dwarf, survived to tell the tale. | ||
The story begins with main character, Popful Mail, chasing the criminal Nuts Cracker through a forest. When defeated, Nuts Cracker's body escapes and Mail cannot claim the bounty on him. However, she learns of a new bounty and becomes reinvigorated when she spots a 2,000,000 gold reward poster for the wizard turned criminal, Muttonhead, near the post. With this, she embarks on her adventure. | The story begins with main character, Popful Mail, chasing the criminal Nuts Cracker through a forest. When defeated, Nuts Cracker's body escapes and Mail cannot claim the bounty on him. However, she learns of a new bounty and becomes reinvigorated when she spots a 2,000,000 gold reward poster for the wizard turned criminal, Muttonhead, near the post. With this, she embarks on her adventure. | ||
| + | |||
==Gameplay== | ==Gameplay== | ||
| − | ''Popful Mail'' is a platform game with RPG elements. At the start of the game, the only playable character is Mail; however, as the game progresses, | + | {{ScreenThumb|Popful Mail, Cutscene.png|width=200|Popful Mail}} |
| + | {{ScreenThumb|Popful Mail, Overworld Map.png|width=200|Overworld map}} | ||
| + | ''Popful Mail'' is a platform game with RPG elements. At the start of the game, the only playable character is Mail; however, as the game progresses, Tatto and Gaw join the quest, and the player may switch between them at any time (except in the middle of dialogue). Each character has different attacks and armors, as well as differences in walking speed and jump height. | ||
| + | |||
| + | The character moves with {{left}} and {{right}} and attacks with {{A}}. The character ducks with {{down}}, which also defends against enemy attacks. The character jumps with {{B}} and jump off platforms with {{down}}+{{B}}. The character opens chests, enters doorways, speaks to characters, flips switches, and reads signs with {{up}}. The character can climb ladders with {{up}} and descend them with {{down}}. The player can summon a menu with {{C}} to change the current character, use or equip an item, or save or load the game. Invoking the menu pauses the game. | ||
| − | The character encounters enemies as well as non-playable characters. Often, when encountering an important character, dialogue begins immediately | + | Stages are nonlinear and involve exploration and backtracking. Players can enter and leave stages freely, with a map screen linking the stages together. The character encounters enemies as well as non-playable characters. Similar to an RPG, the player must investigate and talk to NPCs in order to progress the plot and discover how to move to the next stage. Often, when encountering an important character, dialogue begins immediately. These conversations are voice-acted; however, text accompanies them, and the voiced speech can be turned off if desired. |
| − | The character has 100 health points, and attacks from enemy characters diminish it according to the strength of the attacker. Similarly, all enemies have a 100 health point bar that has to be brought down to 0 for the enemy to be defeated. Enemies are briefly stunned after being hit and can be hit again as they come out of the stun. How much damage is dealt depends on the strength of the character, although an attack always causes the same amount of damage to the same enemy. | + | The character has 100 health points, and attacks from enemy characters diminish it according to the strength of the attacker. Each character has separate health from the others, so the player can switch to another character if one gets low. Similarly, all enemies have a 100 health point bar that has to be brought down to 0 for the enemy to be defeated. Enemies are briefly stunned after being hit and can be hit again as they come out of the stun. How much damage is dealt depends on the strength of the character, although an attack always causes the same amount of damage to the same enemy. |
| − | When an enemy is defeated, it typically drops a bag of gold or a healing item. | + | When an enemy is defeated, it typically drops a bag of gold or a healing item. Enemies respawn when the player leaves the area, so the player can grind enemies for gold. Towns appear in some stages, which contain shops where the player can trade gold for weapons, armor, and other items. Each character can acquire up to five different weapons and various items. Each subsequent weapon is stronger than the preceding one, although the player may switch to any weapons possessed at any time if desired. Other items include healing fruits and a temporary invulnerability charm. Items are obtained from treasure chests, shops, NPCs, and bosses. |
| − | The character has | + | The character has an attack power bar that is depleted as a distance weapon or a magical attack is used. When the bar reaches 0, the character can still perform the weapon motion, but the magical or long range portion of the attack fails. The bar regenerates quickly if given time to do so (if the character uses no attacks or switches to a melee weapon). Use of a distance weapon or magical attack while the bar is regenerating halts the regeneration, which resumes if no attacks that deplete it are made. |
| − | + | Games may usually be saved and loaded at any point in the game (except during dialogue); if a game that was previously saved in a room with a boss is loaded, the game resumes just before the battle, before the character has entered the room. Three save slots are provided. If the player runs out of life on the current character, the character dies and the game ends, but the game can be continued from a save file. | |
===Characters=== | ===Characters=== | ||
| − | |||
====Playable==== | ====Playable==== | ||
{{InfoTable|imagewidths=50| | {{InfoTable|imagewidths=50| | ||
| Line 52: | Line 57: | ||
| title=Mail | | title=Mail | ||
| sprite={{sprite | Popful Mail, Players.png | 1.5 | crop_width=60 | crop_height=52 | crop_x=0 | crop_y=0}} | | sprite={{sprite | Popful Mail, Players.png | 1.5 | crop_width=60 | crop_height=52 | crop_x=0 | crop_y=0}} | ||
| − | | desc=Mail is the main character. She is an unsuccessful female elf bounty hunter. Mail's main target, Nuts Cracker, always seems to escape after she defeats him. Mail has red hair; her elven ears stick outward from her head. She is tomboyish and good-natured but also capricious and confrontational. She is indefatigable in her goal of being a bounty hunter in spite of numerous setbacks. Her main and starting weapon is a sword; she can acquire a dagger | + | | desc=Mail is the main character. She is an unsuccessful female elf bounty hunter. Mail's main target, Nuts Cracker, always seems to escape after she defeats him. Mail has red hair; her elven ears stick outward from her head. She is tomboyish and good-natured but also capricious and confrontational. She is indefatigable in her goal of being a bounty hunter in spite of numerous setbacks. Her main and starting weapon is a sword; she can acquire a dagger, a boomerang, and other swords as the game progresses. She is the fastest character but has the lowest jump. |
}} | }} | ||
{{InfoRow | {{InfoRow | ||
| Line 62: | Line 67: | ||
| title=Gaw | | title=Gaw | ||
| sprite={{sprite | Popful Mail, Players.png | 1.5 | crop_width=60 | crop_height=52 | crop_x=120 | crop_y=0}} | | sprite={{sprite | Popful Mail, Players.png | 1.5 | crop_width=60 | crop_height=52 | crop_x=120 | crop_y=0}} | ||
| − | | desc=Gaw is a small, round, winged, cave-dwelling purple creature. He is almost identical to | + | | desc=Gaw is a small, round, winged, cave-dwelling purple creature. He is almost identical to the others of his species, who all call themselves "Gaw" and often use the word as an interjection when speaking. Mail and Tatt meet Gaw in the second level, the Caves, but Gaw does not join them until later. Gaw's main attack is initially a fireball; subsequent attacks include a tail swipe and clawing. He is the slowest character but has the highest jump. |
}} | }} | ||
}} | }} | ||
| − | + | ====Non-playable==== | |
| − | ====Non- | ||
{{InfoTable|imagewidths=50| | {{InfoTable|imagewidths=50| | ||
{{InfoRow | {{InfoRow | ||
| title=Nuts Cracker | | title=Nuts Cracker | ||
| − | | sprite={{sprite | Popful Mail, Characters.png | 1.5 | crop_width=64 | crop_height=56 | crop_x= | + | | sprite={{sprite | Popful Mail, Characters.png | 1.5 | crop_width=64 | crop_height=56 | crop_x=0 | crop_y=56}} |
| desc=Nuts Cracker, the first villain seen in the game, is the leader of a dangerous criminal gang known as the Gingerbread Grifter Gang. He specializes in manufacturing explosives, especially exploding dolls. Nuts Cracker appears to be human but is fashioned like a wooden nutcracker. He speaks in an exaggerated Italian accent in the Working Designs translation. When defeated, he often throws his head, which then explodes, while his body runs away. Mail has been trying to catch Nuts Cracker for a long time and faced him on many occasions, but he always escapes. | | desc=Nuts Cracker, the first villain seen in the game, is the leader of a dangerous criminal gang known as the Gingerbread Grifter Gang. He specializes in manufacturing explosives, especially exploding dolls. Nuts Cracker appears to be human but is fashioned like a wooden nutcracker. He speaks in an exaggerated Italian accent in the Working Designs translation. When defeated, he often throws his head, which then explodes, while his body runs away. Mail has been trying to catch Nuts Cracker for a long time and faced him on many occasions, but he always escapes. | ||
}} | }} | ||
{{InfoRow | {{InfoRow | ||
| title=Muttonhead | | title=Muttonhead | ||
| − | | sprite={{sprite | Popful Mail, Characters.png | 1.5 | crop_width=64 | crop_height=56 | crop_x= | + | | sprite={{sprite | Popful Mail, Characters.png | 1.5 | crop_width=64 | crop_height=56 | crop_x=64 | crop_y=56}} |
| desc=Muttonhead was formerly a well-known and respected magician before unexpectedly disappearing from public view and turning to crime, a move that left his apprentices puzzled. He is dangerous and his goals are unknown. A 2,000,000 gold bounty is offered for his capture. | | desc=Muttonhead was formerly a well-known and respected magician before unexpectedly disappearing from public view and turning to crime, a move that left his apprentices puzzled. He is dangerous and his goals are unknown. A 2,000,000 gold bounty is offered for his capture. | ||
}} | }} | ||
| Line 90: | Line 94: | ||
}} | }} | ||
| − | === | + | ===Items=== |
| − | + | ====Dropped==== | |
| − | ==== | + | These items are dropped by enemies after they are defeated. |
| − | {{InfoTable|imagewidths= | + | {{InfoTable|imagewidths=50| |
{{InfoRow | {{InfoRow | ||
| − | | title= | + | | title=Gold Bag |
| − | | | + | | sprite={{sprite | Popful Mail, Objects.png | 1.5 | crop_width=24 | crop_height=24 | crop_x=32 | crop_y=0}} |
| − | | | + | | desc=Rewards the player with an amount of gold. |
| − | | | ||
| − | | | ||
| − | | desc= | ||
}} | }} | ||
{{InfoRow | {{InfoRow | ||
| − | | title= | + | | title=Herb |
| − | | | + | | sprite={{sprite | Popful Mail, Objects.png | 1.5 | crop_width=24 | crop_height=24 | crop_x=56 | crop_y=0}} |
| − | | | + | | desc=Restores 5 health. Heals immediately rather than going into the inventory. |
| − | | | ||
| − | | | ||
| − | | desc= | ||
}} | }} | ||
{{InfoRow | {{InfoRow | ||
| − | | title= | + | | title=Gold Bullion |
| − | | | + | | sprite={{sprite | Popful Mail, Objects.png | 1.5 | crop_width=32 | crop_height=24 | crop_x=0 | crop_y=0}} |
| − | | | + | | desc=Can be sold for 500 gold. The same sprite is also used for treasure chests, which can be opened to find items. |
| − | |||
| − | |||
| − | | | ||
| − | | | ||
| − | | desc= | ||
}} | }} | ||
}} | }} | ||
| − | |||
| − | |||
| − | |||
| − | |||
| − | |||
| − | |||
| − | |||
| − | |||
| − | |||
| − | |||
| − | |||
| − | |||
| − | |||
| − | |||
| − | |||
| − | |||
| − | |||
| − | |||
| − | |||
| − | |||
| − | |||
| − | |||
| − | |||
| − | |||
| − | |||
| − | |||
| − | |||
| − | |||
| − | |||
| − | |||
| − | |||
| − | |||
| − | |||
| − | |||
| − | |||
| − | |||
| − | |||
| − | |||
| − | |||
| − | |||
| − | |||
| − | |||
| − | |||
| − | |||
| − | |||
| − | |||
| − | |||
| − | |||
| − | |||
| − | |||
| − | |||
| − | |||
| − | |||
| − | |||
| − | |||
| − | |||
| − | |||
| − | |||
| − | |||
| − | |||
| − | |||
| − | |||
| − | |||
| − | |||
| − | |||
| − | |||
| − | |||
| − | |||
| − | |||
| − | |||
| − | |||
| − | |||
| − | |||
| − | |||
| − | |||
| − | |||
| − | |||
| − | |||
| − | |||
| − | |||
| − | |||
| − | |||
| − | |||
| − | |||
| − | |||
| − | |||
| − | |||
| − | |||
| − | |||
| − | |||
| − | |||
| − | |||
| − | |||
| − | |||
| − | |||
| − | |||
| − | |||
| − | |||
====Weapons==== | ====Weapons==== | ||
| Line 225: | Line 120: | ||
{{InfoRow | {{InfoRow | ||
| title=Short Sword | | title=Short Sword | ||
| − | | sprite= | + | | sprite={{sprite | Popful Mail, Items.png | 1.5 | crop_width=24 | crop_height=24 | crop_x=0 | crop_y=0}} |
| − | | desc=Initially equipped. | + | | desc=Close-range weapon that does not cost attack power to use. Initially equipped. |
}} | }} | ||
{{InfoRow | {{InfoRow | ||
| title=Dagger | | title=Dagger | ||
| − | | sprite= | + | | sprite={{sprite | Popful Mail, Items.png | 1.5 | crop_width=24 | crop_height=24 | crop_x=24 | crop_y=0}} |
| − | | desc=Costs 300 gold. | + | | desc=A horizontal distance attack. Long range but not as strong as the sword. Costs 300 gold. |
}} | }} | ||
{{InfoRow | {{InfoRow | ||
| title=Boomerang | | title=Boomerang | ||
| − | | sprite= | + | | sprite={{sprite | Popful Mail, Items.png | 1.5 | crop_width=24 | crop_height=24 | crop_x=48 | crop_y=0}} |
| − | | desc=Costs 2,000 gold. | + | | desc=A slow-moving but strong ranged attack that returns to Mail and can damage targets coming or going. It can be directed with {{up}} or {{down}}. Costs 2,000 gold. |
}} | }} | ||
{{InfoRow | {{InfoRow | ||
| title=Flame Sword | | title=Flame Sword | ||
| − | | sprite= | + | | sprite={{sprite | Popful Mail, Items.png | 1.5 | crop_width=24 | crop_height=24 | crop_x=72 | crop_y=0}} |
| − | | desc=Costs 3,000 gold. | + | | desc=A powerful sword that creates an arc-shaped barrier of flame at medium range. Costs 3,000 gold. |
}} | }} | ||
{{InfoRow | {{InfoRow | ||
| title=Aura Blade | | title=Aura Blade | ||
| − | | sprite= | + | | sprite={{sprite | Popful Mail, Items.png | 1.5 | crop_width=24 | crop_height=24 | crop_x=96 | crop_y=0}} |
| − | | desc= | + | | desc=A powerful sword that fires fast-moving energy waves horizontally. Given by King Lipps. |
}} | }} | ||
}} | }} | ||
| − | ===== | + | =====Tatto===== |
{{InfoTable|imagewidths=50| | {{InfoTable|imagewidths=50| | ||
{{InfoRow | {{InfoRow | ||
| title=Fire Cane | | title=Fire Cane | ||
| − | | sprite= | + | | sprite={{sprite | Popful Mail, Items.png | 1.5 | crop_width=24 | crop_height=24 | crop_x=0 | crop_y=72}} |
| − | | desc=Initially equipped. | + | | desc=Shoots small balls of fire horizontally. Initially equipped. |
}} | }} | ||
{{InfoRow | {{InfoRow | ||
| title=Dyno Cane | | title=Dyno Cane | ||
| − | | sprite= | + | | sprite={{sprite | Popful Mail, Items.png | 1.5 | crop_width=24 | crop_height=24 | crop_x=24 | crop_y=72}} |
| − | | desc=Costs 300 gold. | + | | desc=Shoots more powerful bolts of fire horizontally. Costs 300 gold. |
}} | }} | ||
{{InfoRow | {{InfoRow | ||
| title=Electro Cane | | title=Electro Cane | ||
| − | | sprite= | + | | sprite={{sprite | Popful Mail, Items.png | 1.5 | crop_width=24 | crop_height=24 | crop_x=48 | crop_y=72}} |
| − | | desc=Costs 2,000 gold. | + | | desc=Shoots medium-sized balls of energy that can be directed with {{up}} and {{down}}. Costs 2,000 gold. |
}} | }} | ||
{{InfoRow | {{InfoRow | ||
| title=Star Cane | | title=Star Cane | ||
| − | | sprite= | + | | sprite={{sprite | Popful Mail, Items.png | 1.5 | crop_width=24 | crop_height=24 | crop_x=72 | crop_y=72}} |
| − | | desc=Costs 3,000 gold. | + | | desc=Conjures stars that seek and attack enemies. It is charged by holding {{B}}, which creates up to eight stars, and then fired when {{B}} is released. Costs 3,000 gold. |
}} | }} | ||
{{InfoRow | {{InfoRow | ||
| title=Aura Cane | | title=Aura Cane | ||
| − | | sprite= | + | | sprite={{sprite | Popful Mail, Items.png | 1.5 | crop_width=24 | crop_height=24 | crop_x=96 | crop_y=72}} |
| − | | desc= | + | | desc=Shoots large balls of fire horizontally. Given by King Lipps. |
}} | }} | ||
}} | }} | ||
| Line 281: | Line 176: | ||
{{InfoRow | {{InfoRow | ||
| title=Fire Ball | | title=Fire Ball | ||
| − | | sprite= | + | | sprite={{sprite | Popful Mail, Items.png | 1.5 | crop_width=24 | crop_height=24 | crop_x=0 | crop_y=144}} |
| − | | desc=Initially equipped. | + | | desc=Shoots medium-sized fireballs horizontally. Initially equipped. |
}} | }} | ||
{{InfoRow | {{InfoRow | ||
| title=Tail Attack | | title=Tail Attack | ||
| − | | sprite= | + | | sprite={{sprite | Popful Mail, Items.png | 1.5 | crop_width=24 | crop_height=24 | crop_x=24 | crop_y=144}} |
| − | | desc=Costs 300 gold. | + | | desc=A close-range spinning tail attack that does not cost attack power. Costs 300 gold. |
}} | }} | ||
{{InfoRow | {{InfoRow | ||
| title=Iron Claw | | title=Iron Claw | ||
| − | | sprite= | + | | sprite={{sprite | Popful Mail, Items.png | 1.5 | crop_width=24 | crop_height=24 | crop_x=48 | crop_y=144}} |
| − | | desc=Costs 2,000 gold. | + | | desc=A medium-range claw swipe that does not cost attack power. Costs 2,000 gold. |
}} | }} | ||
{{InfoRow | {{InfoRow | ||
| title=Firebreath | | title=Firebreath | ||
| − | | sprite= | + | | sprite={{sprite | Popful Mail, Items.png | 1.5 | crop_width=24 | crop_height=24 | crop_x=72 | crop_y=144}} |
| − | | desc=Costs 3,000 gold. | + | | desc=Sprays a stream of fire that spans about half the screen. Lasts for as long as {{B}} is held and drains attack power while it is used. Costs 3,000 gold. |
}} | }} | ||
{{InfoRow | {{InfoRow | ||
| title=Aura Breath | | title=Aura Breath | ||
| − | | sprite= | + | | sprite={{sprite | Popful Mail, Items.png | 1.5 | crop_width=24 | crop_height=24 | crop_x=96 | crop_y=144}} |
| − | | desc= | + | | desc=Sprays a stream of fire that covers the full length of the screen. Lasts for as long as {{B}} is held and drains attack power while it is used. Given by King Lipps. |
}} | }} | ||
}} | }} | ||
| Line 311: | Line 206: | ||
{{InfoRow | {{InfoRow | ||
| title=Armor | | title=Armor | ||
| − | | sprite= | + | | sprite={{sprite | Popful Mail, Items.png | 1.5 | crop_width=120 | crop_height=24 | crop_x=0 | crop_y=24}} |
| desc=<nowiki></nowiki> | | desc=<nowiki></nowiki> | ||
* Leather Mail (500 gold) | * Leather Mail (500 gold) | ||
| Line 321: | Line 216: | ||
{{InfoRow | {{InfoRow | ||
| title=Shields | | title=Shields | ||
| − | | sprite= | + | | sprite={{sprite | Popful Mail, Items.png | 1.5 | crop_width=120 | crop_height=24 | crop_x=0 | crop_y=48}} |
| desc=<nowiki></nowiki> | | desc=<nowiki></nowiki> | ||
* Wood Shield (400 gold) | * Wood Shield (400 gold) | ||
| Line 330: | Line 225: | ||
}} | }} | ||
}} | }} | ||
| − | ===== | + | =====Tatto===== |
{{InfoTable|imagewidths=50| | {{InfoTable|imagewidths=50| | ||
{{InfoRow | {{InfoRow | ||
| title=Armor | | title=Armor | ||
| − | | sprite= | + | | sprite={{sprite | Popful Mail, Items.png | 1.5 | crop_width=120 | crop_height=24 | crop_x=0 | crop_y=96}} |
| desc=<nowiki></nowiki> | | desc=<nowiki></nowiki> | ||
* Flame Robe (500 gold) | * Flame Robe (500 gold) | ||
| Line 344: | Line 239: | ||
{{InfoRow | {{InfoRow | ||
| title=Charms | | title=Charms | ||
| − | | sprite= | + | | sprite={{sprite | Popful Mail, Items.png | 1.5 | crop_width=120 | crop_height=24 | crop_x=0 | crop_y=120}} |
| desc=<nowiki></nowiki> | | desc=<nowiki></nowiki> | ||
* Flame Charm (400 gold) | * Flame Charm (400 gold) | ||
| Line 357: | Line 252: | ||
{{InfoRow | {{InfoRow | ||
| title=Armor | | title=Armor | ||
| − | | sprite= | + | | sprite={{sprite | Popful Mail, Items.png | 1.5 | crop_width=120 | crop_height=24 | crop_x=0 | crop_y=168}} |
| desc=<nowiki></nowiki> | | desc=<nowiki></nowiki> | ||
* Leather Mail (500 gold) | * Leather Mail (500 gold) | ||
| Line 367: | Line 262: | ||
{{InfoRow | {{InfoRow | ||
| title=Bands | | title=Bands | ||
| − | | sprite= | + | | sprite={{sprite | Popful Mail, Items.png | 1.5 | crop_width=120 | crop_height=24 | crop_x=0 | crop_y=192}} |
| desc=<nowiki></nowiki> | | desc=<nowiki></nowiki> | ||
* Leather Band (400 gold) | * Leather Band (400 gold) | ||
| Line 379: | Line 274: | ||
====Healing==== | ====Healing==== | ||
{{InfoTable|imagewidths=50| | {{InfoTable|imagewidths=50| | ||
| − | |||
| − | |||
| − | |||
| − | |||
| − | |||
{{InfoRow | {{InfoRow | ||
| title=Orange | | title=Orange | ||
| − | | sprite= | + | | sprite={{sprite | Popful Mail, Items.png | 1.5 | crop_width=24 | crop_height=24 | crop_x=0 | crop_y=216}} |
| desc=Restores 20 health. Costs 90 gold. | | desc=Restores 20 health. Costs 90 gold. | ||
}} | }} | ||
{{InfoRow | {{InfoRow | ||
| title=Cherry | | title=Cherry | ||
| − | | sprite= | + | | sprite={{sprite | Popful Mail, Items.png | 1.5 | crop_width=24 | crop_height=24 | crop_x=24 | crop_y=216}} |
| desc=Restores 40 health. Costs 180 gold. | | desc=Restores 40 health. Costs 180 gold. | ||
}} | }} | ||
{{InfoRow | {{InfoRow | ||
| title=Apple | | title=Apple | ||
| − | | sprite= | + | | sprite={{sprite | Popful Mail, Items.png | 1.5 | crop_width=24 | crop_height=24 | crop_x=48 | crop_y=216}} |
| desc=Restores 60 health. Costs 270 gold. | | desc=Restores 60 health. Costs 270 gold. | ||
}} | }} | ||
{{InfoRow | {{InfoRow | ||
| title=Banana | | title=Banana | ||
| − | | sprite= | + | | sprite={{sprite | Popful Mail, Items.png | 1.5 | crop_width=24 | crop_height=24 | crop_x=72 | crop_y=216}} |
| desc=Restores 80 health. Costs 650 gold. | | desc=Restores 80 health. Costs 650 gold. | ||
}} | }} | ||
{{InfoRow | {{InfoRow | ||
| title=Melon | | title=Melon | ||
| − | | sprite= | + | | sprite={{sprite | Popful Mail, Items.png | 1.5 | crop_width=24 | crop_height=24 | crop_x=0 | crop_y=216}} |
| desc=Restores 100 health. Costs 1000 gold. | | desc=Restores 100 health. Costs 1000 gold. | ||
}} | }} | ||
| Line 415: | Line 305: | ||
{{InfoRow | {{InfoRow | ||
| title=Gold Bullion | | title=Gold Bullion | ||
| − | | sprite= | + | | sprite={{sprite | Popful Mail, Items.png | 1.5 | crop_width=24 | crop_height=24 | crop_x=0 | crop_y=240}} |
| desc=Can be sold for 500 gold. | | desc=Can be sold for 500 gold. | ||
}} | }} | ||
{{InfoRow | {{InfoRow | ||
| − | | title= | + | | title=Elixyr |
| − | | sprite= | + | | sprite={{sprite | Popful Mail, Items.png | 1.5 | crop_width=24 | crop_height=24 | crop_x=24 | crop_y=240}} |
| − | | desc= | + | | desc=Cheats death by restoring all health when the character would otherwise be slain. Consumed automatically when the current character runs out of health. Costs 10,000 gold. |
}} | }} | ||
{{InfoRow | {{InfoRow | ||
| title=Amulet | | title=Amulet | ||
| − | | sprite= | + | | sprite={{sprite | Popful Mail, Items.png | 1.5 | crop_width=24 | crop_height=24 | crop_x=48 | crop_y=240}} |
| desc=Provides invulnerability; however, the character cannot attack while invulnerable. This item is drained while active but can be toggled on and off to preserve it for later. Costs 1,500 gold. | | desc=Provides invulnerability; however, the character cannot attack while invulnerable. This item is drained while active but can be toggled on and off to preserve it for later. Costs 1,500 gold. | ||
| + | }} | ||
| + | {{InfoRow | ||
| + | | title=Stone Shoes | ||
| + | | sprite={{sprite | Popful Mail, Items.png | 1.5 | crop_width=24 | crop_height=24 | crop_x=48 | crop_y=288}} | ||
| + | | desc=Allows the character to walk on spikes. The character's jump height is impaired while using this item. This item is drained while active but can be toggled on and off to preserve it for later. Costs 1,000 gold. | ||
}} | }} | ||
{{InfoRow | {{InfoRow | ||
| title=Ice Shoes | | title=Ice Shoes | ||
| − | | sprite= | + | | sprite={{sprite | Popful Mail, Items.png | 1.5 | crop_width=24 | crop_height=24 | crop_x=72 | crop_y=288}} |
| desc=Allows the character to walk on fire. This item is drained while active but can be toggled on and off to preserve it for later. Costs 250 gold. | | desc=Allows the character to walk on fire. This item is drained while active but can be toggled on and off to preserve it for later. Costs 250 gold. | ||
}} | }} | ||
{{InfoRow | {{InfoRow | ||
| title=Spiked Boots | | title=Spiked Boots | ||
| − | | sprite= | + | | sprite={{sprite | Popful Mail, Items.png | 1.5 | crop_width=24 | crop_height=24 | crop_x=96 | crop_y=288}} |
| − | | desc=Allows the character to walk on ice without slipping. This item is drained while active but can be toggled on and off to preserve it for later. Costs 500 gold. | + | | desc=Allows the character to walk on ice without slipping. The character's movement speed is slowed while using this item. This item is drained while active but can be toggled on and off to preserve it for later. Costs 500 gold. |
| + | }} | ||
| + | {{InfoRow | ||
| + | | title=Helmet | ||
| + | | sprite={{sprite | Popful Mail, Items.png | 1.5 | crop_width=24 | crop_height=24 | crop_x=72 | crop_y=240}} | ||
| + | | desc=Increases defense for a duration. This item is drained while active but can be toggled on and off to preserve it for later. Costs 300 gold. | ||
| + | }} | ||
| + | }} | ||
| + | |||
| + | ===Stages=== | ||
| + | ====Woods==== | ||
| + | {{InfoTable|imagewidths=320| | ||
| + | {{InfoRow | ||
| + | | title=Elf Woods | ||
| + | | screenshot=Popful Mail, Stages, Elf Woods 1.png | ||
| + | | screenshot2=Popful Mail, Stages, Elf Woods 2.png | ||
| + | | screenshot3=Popful Mail, Stages, Elf Woods 3.png | ||
| + | | screenshot4=Popful Mail, Stages, Elf Woods 4.png | ||
| + | | tabs=yes | ||
| + | | desc=Mail meets fellow elf adventurers Slick, who has characteristically gotten himself into trouble, in the woods and Namo, who is also searching for the Gingerbread Grifter Gang, in a nearby village. She also meets Tatto, a former apprentice of Muttonhead, before fighting the Mad Bomber. | ||
}} | }} | ||
{{InfoRow | {{InfoRow | ||
| − | | title= | + | | title=Treesun |
| − | | | + | | screenshot=Popful Mail, Stages, Treesun 1.png |
| − | | desc= | + | | screenshot2=Popful Mail, Stages, Treesun 2.png |
| + | | screenshot3=Popful Mail, Stages, Treesun 3.png | ||
| + | | screenshot4=Popful Mail, Stages, Treesun 4.png | ||
| + | | tabs=yes | ||
| + | | desc=Mail rescues Namo, who has been imprisoned by a group of wizards. Namo rewards her with some gold and takes her to the village. She meets Mythia, whose wedding ring has been stolen by the Badger Gang. She fights the Thrashmaster+. | ||
| + | }} | ||
| + | {{InfoRow | ||
| + | | title=Elf Woods | ||
| + | | screenshot=Popful Mail, Stages, Elf Woods 5.png | ||
| + | | desc=The player can return to the Elf Woods to defeat the Badger Chief and complete the quest to return the Gold Ring to Mythia in Treesun. | ||
| + | }} | ||
| + | {{InfoRow | ||
| + | | title=Golem Tower | ||
| + | | screenshot=Popful Mail, Stages, Golem Tower.png | ||
| + | | desc=Mail fights the Wood Golem. After defeating the Wood Golem, Mail finds Muttonhead, but he escapes with a spell. Mail frees Tatt, who has been imprisoned by Muttonhead. Tatt joins the party and leads Mail to Muttonhead's hideout in the Wind Cave. | ||
| + | }} | ||
| + | }} | ||
| + | ====Cave==== | ||
| + | {{InfoTable|imagewidths=320| | ||
| + | {{InfoRow | ||
| + | | title=Wind Cave | ||
| + | | screenshot=Popful Mail, Stages, Wind Cave 1.png | ||
| + | | screenshot2=Popful Mail, Stages, Wind Cave 2.png | ||
| + | | screenshot3=Popful Mail, Stages, Wind Cave 3.png | ||
| + | | screenshot4=Popful Mail, Stages, Wind Cave 4.png | ||
| + | | tabs=yes | ||
| + | | desc=Mail and Tatt find Muttonhead, who is chided by someone named Kazyr for losing the Wood Golem and disappears again. The exit to the cave is blocked. They find Slick, who traps himself in a cave-in trying to blow open the exit with a bomb. They run into a strange blue creature who is mad at Slick for setting off the bomb. They eventually free Slick by using another bomb to find a hammer. | ||
| + | }} | ||
| + | {{InfoRow | ||
| + | | title=Fossil Rock | ||
| + | | screenshot=Popful Mail, Stages, Fossil Rock 1.png | ||
| + | | screenshot2=Popful Mail, Stages, Fossil Rock 2.png | ||
| + | | screenshot3=Popful Mail, Stages, Fossil Rock 3.png | ||
| + | | screenshot4=Popful Mail, Stages, Fossil Rock 4.png | ||
| + | | tabs=yes | ||
| + | | desc=Mail and Tatt find the Gaw village, full of blue creatures like the one they ran into before. They find Gaw trapped in a shaft and use a ladder to rescue him. Then they defeat Boney Rubbler, who is holding two more Gaw captive in his lair. In gratitude, the Gaw reward Mail and Tatto with some treasure, including a key that grants them passage to the other side of the cave. | ||
| + | }} | ||
| + | {{InfoRow | ||
| + | | title=Wind Cave | ||
| + | | screenshot=Popful Mail, Stages, Wind Cave 5.png | ||
| + | | desc=With the key given to them by the Gaw, Mail and Tatt can now unlock the door to the Hot Springs. | ||
| + | }} | ||
| + | {{InfoRow | ||
| + | | title=Hot Springs | ||
| + | | screenshot=Popful Mail, Stages, Hot Springs 1.png | ||
| + | | screenshot2=Popful Mail, Stages, Hot Springs 2.png | ||
| + | | screenshot3=Popful Mail, Stages, Hot Springs 3.png | ||
| + | | screenshot4=Popful Mail, Stages, Hot Springs 4.png | ||
| + | | tabs=yes | ||
| + | | desc=Mail and Tatt learn that the Gaw have captured Muttonhead and are holding him captive at the top of the caves. They run into Nuts Cracker, who reveals that he is working for Muttonhead. They defeat him, but once again, his body escapes. | ||
| + | }} | ||
| + | {{InfoRow | ||
| + | | title=Deviant Den | ||
| + | | screenshot=Popful Mail, Stages, Deviant Den 1.png | ||
| + | | screenshot2=Popful Mail, Stages, Deviant Den 2.png | ||
| + | | screenshot3=Popful Mail, Stages, Deviant Den 3.png | ||
| + | | screenshot4=Popful Mail, Stages, Deviant Den 4.png | ||
| + | | tabs=yes | ||
| + | | desc=The Gaw tell Mail and Tatt about Goradus, a monster that lives on Panic Peak that would destroy the Gaw cave if woken from its eternal slumber. They have imprisoned Muttonhead for trying to awaken Goradus. They search the area and find a key for the area where he is being held and question him about his motivations. After leaving, they find out that Slick has awakened Goradus with one of his bombs. The Gaw promise to turn Muttonhead over to them if they can defeat Goradus. But first, they must fight the Gatekeeper of Panic Peak. | ||
| + | }} | ||
| + | {{InfoRow | ||
| + | | title=Panic Peak | ||
| + | | screenshot=Popful Mail, Stages, Panic Peak.png | ||
| + | | desc=Mail and Tatt fight Goradus. Gaw joins the party and gives them Muttonhead after they are victorious. They see Bountyville under siege on their way back. Tatt deduces that it is the work of Kazyr and the Overlord. Muttonhead brags that he broke the Seal imprisoning the Masters of Evil and released them. Tatt offers that the group should venture to the Sanctuary in the old mines to find the dwarf who crafted the Seal so they can learn how to reactivate it. | ||
| + | }} | ||
| + | }} | ||
| + | ====Mine==== | ||
| + | {{InfoTable|imagewidths=320| | ||
| + | {{InfoRow | ||
| + | | title=Mine | ||
| + | | screenshot=Popful Mail, Stages, Mine 1.png | ||
| + | | screenshot2=Popful Mail, Stages, Mine 2.png | ||
| + | | screenshot3=Popful Mail, Stages, Mine 3.png | ||
| + | | screenshot4=Popful Mail, Stages, Mine 4.png | ||
| + | | tabs=yes | ||
| + | | desc=The group travels to the mines and meets the dwarf artisan Glug, who gives them a trinket that they use to bribe the Rebel Army guards that are barring their way. Their leader, Venuncio, tricks them into a trap. Muttonhead blamed the attack on Bountyville on them, and now there is a 3,000,000 gold bounty on the group. They defeat the Happy Flames of Death and escape the trap. They meet Glug near the surface of the mine, where they discover that the village has been looted and destroyed. The Mythril Guardian of the dwarves and their mythril has been taken. Mail vows to get the mythril back and defeat Venuncio. | ||
| + | }} | ||
| + | {{InfoRow | ||
| + | | title=Zoth Shrine | ||
| + | | screenshot=Popful Mail, Stages, Zoth Shrine 1.png | ||
| + | | screenshot2=Popful Mail, Stages, Zoth Shrine 2.png | ||
| + | | screenshot3=Popful Mail, Stages, Zoth Shrine 3.png | ||
| + | | screenshot4=Popful Mail, Stages, Zoth Shrine 4.png | ||
| + | | tabs=yes | ||
| + | | desc=The group pursues Venuncio to the Zoth Shrine, where they must fight the Mythril Guardian. After defeating it, Sven T. Uncommon, a fallen hero who now serves the Overlord, appears and fights them as well. After apparently defeating him, the group finds Mumbles, the old dwarf who created the Seal that imprisoned the Masters of Evil. Sven returns and abducts Mumbles, having been led to him by the group. Sven kills Venuncio, having no more use for him, and fights the group again, this time taking the form of Chargon. | ||
| + | }} | ||
| + | {{InfoRow | ||
| + | | title=Fort Fryght | ||
| + | | screenshot=Popful Mail, Stages, Fort Fryght.png | ||
| + | | desc=The group fight Sven again, now in the form of a Fire Golem. After the fight, they free Mumbles, who instructs them that they must recover the four Power Orbs, which must be placed on the pedestals in the Orb Tower by one true of heart. The first is in Mt. Rip in the land of Chilly. | ||
| + | }} | ||
| + | }} | ||
| + | ====Chilly==== | ||
| + | {{InfoTable|imagewidths=320| | ||
| + | {{InfoRow | ||
| + | | title=Icycal | ||
| + | | screenshot=Popful Mail, Stages, Icycal 1.png | ||
| + | | screenshot2=Popful Mail, Stages, Icycal 2.png | ||
| + | | screenshot3=Popful Mail, Stages, Icycal 3.png | ||
| + | | screenshot4=Popful Mail, Stages, Icycal 4.png | ||
| + | | tabs=yes | ||
| + | | desc=Guards throw the group in jail shortly after they arrive in Chilly. King Lipps informs them that he is looking for the Power Orbs and discourages the group from leaving the town. | ||
| + | }} | ||
| + | {{InfoRow | ||
| + | | title=Mt. Rip | ||
| + | | screenshot=Popful Mail, Stages, Mt. Rip 1.png | ||
| + | | screenshot2=Popful Mail, Stages, Mt. Rip 2.png | ||
| + | | screenshot3=Popful Mail, Stages, Mt. Rip 3.png | ||
| + | | screenshot4=Popful Mail, Stages, Mt. Rip 4.png | ||
| + | | tabs=yes | ||
| + | | desc=The group finds Slick frozen in ice and frees him. They then run into Muttonhead and Nuts Cracker, who freeze them and escape. After being rescued by Slick, they fight Wriph, an agent of the Overlord, and retrieve the Black Orb from her. | ||
| + | }} | ||
| + | {{InfoRow | ||
| + | | title=Mine | ||
| + | | screenshot=Popful Mail, Stages, Mine 5.png | ||
| + | | desc=The player must return to the mines to get a pot of coffee with which to unfreeze Slick. | ||
| + | }} | ||
| + | {{InfoRow | ||
| + | | title=Gyp Ship | ||
| + | | screenshot=Popful Mail, Stages, Gyp Ship 1.png | ||
| + | | screenshot2=Popful Mail, Stages, Gyp Ship 2.png | ||
| + | | screenshot3=Popful Mail, Stages, Gyp Ship 3.png | ||
| + | | screenshot4=Popful Mail, Stages, Gyp Ship 4.png | ||
| + | | tabs=yes | ||
| + | | desc=The group fights Wriph's twin sister Wraph and defeat her to obtain the Red Orb. They find King Lipps and Slick in captivity and learn that the other King Lipps is an imposter. | ||
| + | }} | ||
| + | {{InfoRow | ||
| + | | title=Crystal Tower | ||
| + | | screenshot=Popful Mail, Stages, Crystal Tower 1.png | ||
| + | | screenshot2=Popful Mail, Stages, Crystal Tower 2.png | ||
| + | | tabs=yes | ||
| + | | desc=The group fights the fake King Lipps, who transforms into the Draquin. They defeat him and take the Blue Orb from him; he tells them that the last Orb is located in the Overlord's palace. The real King Lipps thanks them and gives them each an aura weapon. | ||
| + | }} | ||
| + | }} | ||
| + | ====Castle==== | ||
| + | {{InfoTable|imagewidths=320| | ||
| + | {{InfoRow | ||
| + | | title=Freaky Foyer | ||
| + | | screenshot=Popful Mail, Stages, Freaky Foyer 1.png | ||
| + | | screenshot2=Popful Mail, Stages, Freaky Foyer 2.png | ||
| + | | screenshot3=Popful Mail, Stages, Freaky Foyer 3.png | ||
| + | | screenshot4=Popful Mail, Stages, Freaky Foyer 4.png | ||
| + | | tabs=yes | ||
| + | | desc=The group enters the castle at Creepy Crag and meets Kazyr, the Underlord, who taunts them. The player must find a key to enter the boss area, where the group fights the Rock Sentry. | ||
| + | }} | ||
| + | {{InfoRow | ||
| + | | title=Hassle Hall | ||
| + | | screenshot=Popful Mail, Stages, Hassle Hall 1.png | ||
| + | | screenshot2=Popful Mail, Stages, Hassle Hall 2.png | ||
| + | | screenshot3=Popful Mail, Stages, Hassle Hall 3.png | ||
| + | | screenshot4=Popful Mail, Stages, Hassle Hall 4.png | ||
| + | | tabs=yes | ||
| + | | desc=The player must again find a key to progress. The group fights the Fright Knight, who drops the Yellow Orb. Muttonhead informs them that they cannot enter the gate to the pinnacle of the Orb Tower without the Dragon Stone. | ||
| + | }} | ||
| + | {{InfoRow | ||
| + | | title=Maniac Mazes | ||
| + | | screenshot=Popful Mail, Stages, Maniac Mazes 1.png | ||
| + | | screenshot2=Popful Mail, Stages, Maniac Mazes 2.png | ||
| + | | screenshot3=Popful Mail, Stages, Maniac Mazes 3.png | ||
| + | | screenshot4=Popful Mail, Stages, Maniac Mazes 4.png | ||
| + | | tabs=yes | ||
| + | | desc=A maze where the group fights the Clobster, which drops the Dragon Stone. Afterwards, they run into Slick and Glug and learn that Glug inadvertently created a mythril golem for the Overlord. | ||
| + | }} | ||
| + | {{InfoRow | ||
| + | | title=Orb Tower | ||
| + | | screenshot=Popful Mail, Stages, Orb Tower 1.png | ||
| + | | screenshot2=Popful Mail, Stages, Orb Tower 2.png | ||
| + | | screenshot3=Popful Mail, Stages, Orb Tower 3.png | ||
| + | | screenshot4=Popful Mail, Stages, Orb Tower 4.png | ||
| + | | tabs=yes | ||
| + | | desc=The group enters the Orb Tower and run into Muttonhead and Nuts Cracker. They fight and defeat Nuts Cracker. Then they use the Dragon Stone to open the gate to the pinnacle of the tower and find Muttonhead there. Muttonhead says that he has destroyed the Black Seal, releasing the Overlord. Glug and Slick arrive and detain Muttonhead. The group places the Power Orbs in the pedestals of the tower. Before they place the last one, Kazyr appears to fight them. After he is defeated, Mail places the last Orb in the pedestal. Rather than restoring the Black Seal, the group is warped to Morgal's dimensional palace. | ||
}} | }} | ||
{{InfoRow | {{InfoRow | ||
| − | | title= | + | | title=The Masters of Evil |
| − | | | + | | screenshot=Popful Mail, Stages, Morgal.png |
| − | | desc= | + | | screenshot2=Popful Mail, Stages, Necros.png |
| + | | screenshot3=Popful Mail, Stages, Ulgar.png | ||
| + | | tabs=yes | ||
| + | | desc=The group splits up to face the three Masters of Evil individually. Gaw fights Morgal, the Lord of Beasts; Tatto fights Necros, the Master of War; and Mail fights Ulgar, the Overlord. | ||
}} | }} | ||
}} | }} | ||
| Line 503: | Line 590: | ||
*'''Kazyr:''' T. Owen Smith | *'''Kazyr:''' T. Owen Smith | ||
*'''Song Performed by:''' Jennifer Stigile | *'''Song Performed by:''' Jennifer Stigile | ||
| + | | source=In-game credits (US) | ||
| + | | pdf=Popful Mail MCD US credits.pdf | ||
| console=MCD | | console=MCD | ||
}} | }} | ||
}} | }} | ||
| + | |||
| + | ==Digital manuals== | ||
| + | <gallery> | ||
| + | PopfulMail MCD JP MDMini2 manual.pdf|Mega Drive Mini 2 JP manual | ||
| + | </gallery> | ||
==Magazine articles== | ==Magazine articles== | ||
| Line 518: | Line 612: | ||
|sv|23|49 | |sv|23|49 | ||
|gamepro|68|97 | |gamepro|68|97 | ||
| − | |gamepro|69| | + | |gamepro|69|91 |
}} | }} | ||
|{{galleryPrintAd|bemega|1994-04|4}} | |{{galleryPrintAd|bemega|1994-04|4}} | ||
| Line 528: | Line 622: | ||
| gi=90 | | gi=90 | ||
| gi_source={{num|103}} | | gi_source={{num|103}} | ||
| − | |||
| − | |||
}} | }} | ||
{{Scanbox | {{Scanbox | ||
| Line 550: | Line 642: | ||
==Technical information== | ==Technical information== | ||
| − | + | {{mainArticle|{{PAGENAME}}/Technical information}} | |
| − | {{ | ||
| − | {{ | ||
| − | |||
| − | |||
| − | |||
| − | |||
| − | |||
| − | |||
| − | |||
| − | |||
| − | |||
| − | }} | ||
| − | }} | ||
==External links== | ==External links== | ||
| Line 569: | Line 648: | ||
==References== | ==References== | ||
| + | {{NECRetro|italics=yes}} | ||
<references/> | <references/> | ||
| − | |||
{{PopfulMailOmni}} | {{PopfulMailOmni}} | ||
| + | [[Category:Mega Drive Mini 2 games]] | ||
Latest revision as of 18:14, 13 September 2023
| |||||||||||||||
| Popful Mail | |||||||||||||||
|---|---|---|---|---|---|---|---|---|---|---|---|---|---|---|---|
| System(s): Sega Mega-CD | |||||||||||||||
| Publisher: Sega | |||||||||||||||
| Developer: Sega Falcom, Working Designs | |||||||||||||||
| Licensor: Nihon Falcom | |||||||||||||||
| Original system(s): PC-8801 | |||||||||||||||
| Developer(s) of original games: Falcom | |||||||||||||||
| Peripherals supported: CD BackUp RAM Cart | |||||||||||||||
| Genre: Action[1][2] | |||||||||||||||
| Number of players: 1 | |||||||||||||||
| |||||||||||||||
|


Popful Mail (ぽっぷるメイル) is platform game, originally developed by Falcom for the PC-88 in 1991. It was ported to the Sega Mega-CD by Sega Falcom in 1994. A demo disc, called Popful Mail Taikenban, was also released.
Sega of America originally intended to localize the game as Sister Sonic but abandoned this plan after receiving negative feedback. Ultimately, it was given to Working Designs to localize.
Contents
Story

The story is set in an unnamed fantasy world where, long ago, three fallen gods of darkness known as the Masters of Evil attempted to lay siege to the mortal plane. They were known as Morgal, the Lord of Beasts, commander of the feral and the most voracious of monsters and beasts; Necros, the Master of War, corruptor of men and the inciter of temptation and vice; and Ulgar, the Overlord, the leader of the Masters of Evil and wielder of the most evil of magics. At the end of the great war that threatened all who lived in it, the Masters of Evil were sealed away in a floating tower far from the reach of anyone, and only three warriors, an elf, a human, and a dwarf, survived to tell the tale.
The story begins with main character, Popful Mail, chasing the criminal Nuts Cracker through a forest. When defeated, Nuts Cracker's body escapes and Mail cannot claim the bounty on him. However, she learns of a new bounty and becomes reinvigorated when she spots a 2,000,000 gold reward poster for the wizard turned criminal, Muttonhead, near the post. With this, she embarks on her adventure.
Gameplay


Popful Mail is a platform game with RPG elements. At the start of the game, the only playable character is Mail; however, as the game progresses, Tatto and Gaw join the quest, and the player may switch between them at any time (except in the middle of dialogue). Each character has different attacks and armors, as well as differences in walking speed and jump height.
The character moves with ![]() and
and ![]() and attacks with
and attacks with ![]() . The character ducks with
. The character ducks with ![]() , which also defends against enemy attacks. The character jumps with
, which also defends against enemy attacks. The character jumps with ![]() and jump off platforms with
and jump off platforms with ![]() +
+![]() . The character opens chests, enters doorways, speaks to characters, flips switches, and reads signs with
. The character opens chests, enters doorways, speaks to characters, flips switches, and reads signs with ![]() . The character can climb ladders with
. The character can climb ladders with ![]() and descend them with
and descend them with ![]() . The player can summon a menu with
. The player can summon a menu with ![]() to change the current character, use or equip an item, or save or load the game. Invoking the menu pauses the game.
to change the current character, use or equip an item, or save or load the game. Invoking the menu pauses the game.
Stages are nonlinear and involve exploration and backtracking. Players can enter and leave stages freely, with a map screen linking the stages together. The character encounters enemies as well as non-playable characters. Similar to an RPG, the player must investigate and talk to NPCs in order to progress the plot and discover how to move to the next stage. Often, when encountering an important character, dialogue begins immediately. These conversations are voice-acted; however, text accompanies them, and the voiced speech can be turned off if desired.
The character has 100 health points, and attacks from enemy characters diminish it according to the strength of the attacker. Each character has separate health from the others, so the player can switch to another character if one gets low. Similarly, all enemies have a 100 health point bar that has to be brought down to 0 for the enemy to be defeated. Enemies are briefly stunned after being hit and can be hit again as they come out of the stun. How much damage is dealt depends on the strength of the character, although an attack always causes the same amount of damage to the same enemy.
When an enemy is defeated, it typically drops a bag of gold or a healing item. Enemies respawn when the player leaves the area, so the player can grind enemies for gold. Towns appear in some stages, which contain shops where the player can trade gold for weapons, armor, and other items. Each character can acquire up to five different weapons and various items. Each subsequent weapon is stronger than the preceding one, although the player may switch to any weapons possessed at any time if desired. Other items include healing fruits and a temporary invulnerability charm. Items are obtained from treasure chests, shops, NPCs, and bosses.
The character has an attack power bar that is depleted as a distance weapon or a magical attack is used. When the bar reaches 0, the character can still perform the weapon motion, but the magical or long range portion of the attack fails. The bar regenerates quickly if given time to do so (if the character uses no attacks or switches to a melee weapon). Use of a distance weapon or magical attack while the bar is regenerating halts the regeneration, which resumes if no attacks that deplete it are made.
Games may usually be saved and loaded at any point in the game (except during dialogue); if a game that was previously saved in a room with a boss is loaded, the game resumes just before the battle, before the character has entered the room. Three save slots are provided. If the player runs out of life on the current character, the character dies and the game ends, but the game can be continued from a save file.
Characters
Playable
| Mail is the main character. She is an unsuccessful female elf bounty hunter. Mail's main target, Nuts Cracker, always seems to escape after she defeats him. Mail has red hair; her elven ears stick outward from her head. She is tomboyish and good-natured but also capricious and confrontational. She is indefatigable in her goal of being a bounty hunter in spite of numerous setbacks. Her main and starting weapon is a sword; she can acquire a dagger, a boomerang, and other swords as the game progresses. She is the fastest character but has the lowest jump. | |
| Tatto | |
| Tatto (or Tatt for short) is a magician, a former apprentice of Muttonhead. He wears a red hat and robe. He chases after his master, who has left him and his fellow students, in order to find out why and ultimately dissuade him from his path. Tatt is polite and somewhat timid. He is sometimes ridiculed for his agreeable nature. He meets Mail in the first level. His main weapon is a magical staff. | |
| Gaw | |
| Gaw is a small, round, winged, cave-dwelling purple creature. He is almost identical to the others of his species, who all call themselves "Gaw" and often use the word as an interjection when speaking. Mail and Tatt meet Gaw in the second level, the Caves, but Gaw does not join them until later. Gaw's main attack is initially a fireball; subsequent attacks include a tail swipe and clawing. He is the slowest character but has the highest jump. |

Non-playable
| Nuts Cracker | |
|---|---|
| Nuts Cracker, the first villain seen in the game, is the leader of a dangerous criminal gang known as the Gingerbread Grifter Gang. He specializes in manufacturing explosives, especially exploding dolls. Nuts Cracker appears to be human but is fashioned like a wooden nutcracker. He speaks in an exaggerated Italian accent in the Working Designs translation. When defeated, he often throws his head, which then explodes, while his body runs away. Mail has been trying to catch Nuts Cracker for a long time and faced him on many occasions, but he always escapes. | |
| Muttonhead | |
| Muttonhead was formerly a well-known and respected magician before unexpectedly disappearing from public view and turning to crime, a move that left his apprentices puzzled. He is dangerous and his goals are unknown. A 2,000,000 gold bounty is offered for his capture. | |
| Slick | |
| Slick is an elf acquaintance of Mail's. He often wants to tag along with Mail on her adventures, which, along with his bad jokes and obnoxious demeanor, annoys her to no end. He often causes more trouble than he solves, and is especially infamous for his use of home-made bombs, which his grandfather taught him how to make. | |
| Glug | |
| Glug is a kind-hearted but slow-witted dwarf artisan from the mines. Unlike everyone else, he enjoys Slick's company, and they are both friends. It is hinted that Glug suffers from mental problems as a result of a strong knock on the head, which might also explain his naiveté and short memory. |

Items
Dropped
These items are dropped by enemies after they are defeated.
| Gold Bag | |
|---|---|
| Rewards the player with an amount of gold. | |
| Herb | |
| Restores 5 health. Heals immediately rather than going into the inventory. | |
| Gold Bullion | |
| Can be sold for 500 gold. The same sprite is also used for treasure chests, which can be opened to find items. |
Weapons
| Short Sword | |
|---|---|
| Close-range weapon that does not cost attack power to use. Initially equipped. | |
| Dagger | |
| A horizontal distance attack. Long range but not as strong as the sword. Costs 300 gold. | |
| Boomerang | |
| A slow-moving but strong ranged attack that returns to Mail and can damage targets coming or going. It can be directed with | |
| Flame Sword | |
| A powerful sword that creates an arc-shaped barrier of flame at medium range. Costs 3,000 gold. | |
| Aura Blade | |
| A powerful sword that fires fast-moving energy waves horizontally. Given by King Lipps. |

Tatto
| Fire Cane | |
|---|---|
| Shoots small balls of fire horizontally. Initially equipped. | |
| Dyno Cane | |
| Shoots more powerful bolts of fire horizontally. Costs 300 gold. | |
| Electro Cane | |
| Shoots medium-sized balls of energy that can be directed with | |
| Star Cane | |
| Conjures stars that seek and attack enemies. It is charged by holding | |
| Aura Cane | |
| Shoots large balls of fire horizontally. Given by King Lipps. |
Gaw
| Fire Ball | |
|---|---|
| Shoots medium-sized fireballs horizontally. Initially equipped. | |
| Tail Attack | |
| A close-range spinning tail attack that does not cost attack power. Costs 300 gold. | |
| Iron Claw | |
| A medium-range claw swipe that does not cost attack power. Costs 2,000 gold. | |
| Firebreath | |
| Sprays a stream of fire that spans about half the screen. Lasts for as long as | |
| Aura Breath | |
| Sprays a stream of fire that covers the full length of the screen. Lasts for as long as |
Armor
| Armor | |
|---|---|
| |
| Shields | |
|
Tatto
| Armor | |
|---|---|
| |
| Charms | |
|
Gaw
| Armor | |
|---|---|
| |
| Bands | |
|
Healing
| Orange | |
|---|---|
| Restores 20 health. Costs 90 gold. | |
| Cherry | |
| Restores 40 health. Costs 180 gold. | |
| Apple | |
| Restores 60 health. Costs 270 gold. | |
| Banana | |
| Restores 80 health. Costs 650 gold. | |
| Melon | |
| Restores 100 health. Costs 1000 gold. |
Special
| Gold Bullion | |
|---|---|
| Can be sold for 500 gold. | |
| Elixyr | |
| Cheats death by restoring all health when the character would otherwise be slain. Consumed automatically when the current character runs out of health. Costs 10,000 gold. | |
| Amulet | |
| Provides invulnerability; however, the character cannot attack while invulnerable. This item is drained while active but can be toggled on and off to preserve it for later. Costs 1,500 gold. | |
| Stone Shoes | |
| Allows the character to walk on spikes. The character's jump height is impaired while using this item. This item is drained while active but can be toggled on and off to preserve it for later. Costs 1,000 gold. | |
| Ice Shoes | |
| Allows the character to walk on fire. This item is drained while active but can be toggled on and off to preserve it for later. Costs 250 gold. | |
| Spiked Boots | |
| Allows the character to walk on ice without slipping. The character's movement speed is slowed while using this item. This item is drained while active but can be toggled on and off to preserve it for later. Costs 500 gold. | |
| Helmet | |
| Increases defense for a duration. This item is drained while active but can be toggled on and off to preserve it for later. Costs 300 gold. |
Stages
Woods
| Elf Woods | |
|---|---|
| Mail meets fellow elf adventurers Slick, who has characteristically gotten himself into trouble, in the woods and Namo, who is also searching for the Gingerbread Grifter Gang, in a nearby village. She also meets Tatto, a former apprentice of Muttonhead, before fighting the Mad Bomber. | |
| Treesun | |
| Mail rescues Namo, who has been imprisoned by a group of wizards. Namo rewards her with some gold and takes her to the village. She meets Mythia, whose wedding ring has been stolen by the Badger Gang. She fights the Thrashmaster+. | |
| Elf Woods | |
| The player can return to the Elf Woods to defeat the Badger Chief and complete the quest to return the Gold Ring to Mythia in Treesun. | |
| Golem Tower | |
| Mail fights the Wood Golem. After defeating the Wood Golem, Mail finds Muttonhead, but he escapes with a spell. Mail frees Tatt, who has been imprisoned by Muttonhead. Tatt joins the party and leads Mail to Muttonhead's hideout in the Wind Cave. |


Cave
| Wind Cave | |
|---|---|
| Mail and Tatt find Muttonhead, who is chided by someone named Kazyr for losing the Wood Golem and disappears again. The exit to the cave is blocked. They find Slick, who traps himself in a cave-in trying to blow open the exit with a bomb. They run into a strange blue creature who is mad at Slick for setting off the bomb. They eventually free Slick by using another bomb to find a hammer. | |
| Fossil Rock | |
| Mail and Tatt find the Gaw village, full of blue creatures like the one they ran into before. They find Gaw trapped in a shaft and use a ladder to rescue him. Then they defeat Boney Rubbler, who is holding two more Gaw captive in his lair. In gratitude, the Gaw reward Mail and Tatto with some treasure, including a key that grants them passage to the other side of the cave. | |
| Wind Cave | |
| With the key given to them by the Gaw, Mail and Tatt can now unlock the door to the Hot Springs. | |
| Hot Springs | |
| Mail and Tatt learn that the Gaw have captured Muttonhead and are holding him captive at the top of the caves. They run into Nuts Cracker, who reveals that he is working for Muttonhead. They defeat him, but once again, his body escapes. | |
| Deviant Den | |
| The Gaw tell Mail and Tatt about Goradus, a monster that lives on Panic Peak that would destroy the Gaw cave if woken from its eternal slumber. They have imprisoned Muttonhead for trying to awaken Goradus. They search the area and find a key for the area where he is being held and question him about his motivations. After leaving, they find out that Slick has awakened Goradus with one of his bombs. The Gaw promise to turn Muttonhead over to them if they can defeat Goradus. But first, they must fight the Gatekeeper of Panic Peak. | |
| Panic Peak | |
| Mail and Tatt fight Goradus. Gaw joins the party and gives them Muttonhead after they are victorious. They see Bountyville under siege on their way back. Tatt deduces that it is the work of Kazyr and the Overlord. Muttonhead brags that he broke the Seal imprisoning the Masters of Evil and released them. Tatt offers that the group should venture to the Sanctuary in the old mines to find the dwarf who crafted the Seal so they can learn how to reactivate it. |


Mine
| Mine | |
|---|---|
| The group travels to the mines and meets the dwarf artisan Glug, who gives them a trinket that they use to bribe the Rebel Army guards that are barring their way. Their leader, Venuncio, tricks them into a trap. Muttonhead blamed the attack on Bountyville on them, and now there is a 3,000,000 gold bounty on the group. They defeat the Happy Flames of Death and escape the trap. They meet Glug near the surface of the mine, where they discover that the village has been looted and destroyed. The Mythril Guardian of the dwarves and their mythril has been taken. Mail vows to get the mythril back and defeat Venuncio. | |
| Zoth Shrine | |
| The group pursues Venuncio to the Zoth Shrine, where they must fight the Mythril Guardian. After defeating it, Sven T. Uncommon, a fallen hero who now serves the Overlord, appears and fights them as well. After apparently defeating him, the group finds Mumbles, the old dwarf who created the Seal that imprisoned the Masters of Evil. Sven returns and abducts Mumbles, having been led to him by the group. Sven kills Venuncio, having no more use for him, and fights the group again, this time taking the form of Chargon. | |
| Fort Fryght | |
| The group fight Sven again, now in the form of a Fire Golem. After the fight, they free Mumbles, who instructs them that they must recover the four Power Orbs, which must be placed on the pedestals in the Orb Tower by one true of heart. The first is in Mt. Rip in the land of Chilly. |


Chilly
| Icycal | |
|---|---|
| Guards throw the group in jail shortly after they arrive in Chilly. King Lipps informs them that he is looking for the Power Orbs and discourages the group from leaving the town. | |
| Mt. Rip | |
| The group finds Slick frozen in ice and frees him. They then run into Muttonhead and Nuts Cracker, who freeze them and escape. After being rescued by Slick, they fight Wriph, an agent of the Overlord, and retrieve the Black Orb from her. | |
| Mine | |
| The player must return to the mines to get a pot of coffee with which to unfreeze Slick. | |
| Gyp Ship | |
| The group fights Wriph's twin sister Wraph and defeat her to obtain the Red Orb. They find King Lipps and Slick in captivity and learn that the other King Lipps is an imposter. | |
| Crystal Tower | |
| The group fights the fake King Lipps, who transforms into the Draquin. They defeat him and take the Blue Orb from him; he tells them that the last Orb is located in the Overlord's palace. The real King Lipps thanks them and gives them each an aura weapon. |


Castle
| Freaky Foyer | |
|---|---|
| The group enters the castle at Creepy Crag and meets Kazyr, the Underlord, who taunts them. The player must find a key to enter the boss area, where the group fights the Rock Sentry. | |
| Hassle Hall | |
| The player must again find a key to progress. The group fights the Fright Knight, who drops the Yellow Orb. Muttonhead informs them that they cannot enter the gate to the pinnacle of the Orb Tower without the Dragon Stone. | |
| Maniac Mazes | |
| A maze where the group fights the Clobster, which drops the Dragon Stone. Afterwards, they run into Slick and Glug and learn that Glug inadvertently created a mythril golem for the Overlord. | |
| Orb Tower | |
| The group enters the Orb Tower and run into Muttonhead and Nuts Cracker. They fight and defeat Nuts Cracker. Then they use the Dragon Stone to open the gate to the pinnacle of the tower and find Muttonhead there. Muttonhead says that he has destroyed the Black Seal, releasing the Overlord. Glug and Slick arrive and detain Muttonhead. The group places the Power Orbs in the pedestals of the tower. Before they place the last one, Kazyr appears to fight them. After he is defeated, Mail places the last Orb in the pedestal. Rather than restoring the Black Seal, the group is warped to Morgal's dimensional palace. | |
| The Masters of Evil | |
| The group splits up to face the three Masters of Evil individually. Gaw fights Morgal, the Lord of Beasts; Tatto fights Necros, the Master of War; and Mail fights Ulgar, the Overlord. |


Production credits
Japanese version
- 声の出演
- メイル: 林原 めぐみ
- タット: 石田 彰
- ガウ: 千葉 繁
- マテリアル: 石森 達幸
- ブラッキィ: 飛田 展男
- ミフィ: 田野 恵
- ヤコブ: 三浦 雅子
- ツェイマー: 大場 真人
- ナモ: 清水 浩智
- リップ: 松下 美由紀
- ラップ: 水沢 潤
- アルカザール: 森川 智之
- ルードゥル: 宮田 浩徳
US version
- Director: Victor Ireland
- Assistant Director: Dean Williams
- English Translation: Akiko Skjellerup, Horkom International, Victor Ireland, Dean Williams
- Sound Engineers: Bill Staeck, Don Shirley
- Additional Music: Bill King
- Reprogramming: Shigeo Koyama
- Popful Mail: Melissa Gulden
- Gaw: Blake Dorsey
- Tatto: Shaun Watkins
- Muttonhead: Keith Lack
- Nuts Cracker: Blake Dorsey
- Slick: Ashley Angel
- Glug: Nancy Davis
- Sven T. Uncommon: Matt Atwood
- Venuncio: Greg Soriano
- Mumbles: John Truitt
- Wriph: Marilyn Weeks
- Wraph: Katie Staeck
- Lipps: Mike E. Miller
- Kazyr: T. Owen Smith
- Song Performed by: Jennifer Stigile
Digital manuals
Mega Drive Mini 2 JP manual
Magazine articles
- Main article: Popful Mail/Magazine articles.
Promotional material
also published in:
- VideoGames (US) #72: "January 1995" (199x-xx-xx)[8]
- Game Players (US) #0802: "Vol. 8 No. 2 February 1995" (1995-0x-xx)[9]
- Sega Visions (US) #23: "February/March 1995" (199x-xx-xx)[10]
- GamePro (US) #68: "March 1995" (1995-xx-xx)[11]
- GamePro (US) #69: "April 1995" (1995-xx-xx)[12]

Physical scans
| Sega Retro Average | |||||||||||||||||||||||||||||||||||||||||||||||||||||||||||||||||||||||||||||||||||||||||
|---|---|---|---|---|---|---|---|---|---|---|---|---|---|---|---|---|---|---|---|---|---|---|---|---|---|---|---|---|---|---|---|---|---|---|---|---|---|---|---|---|---|---|---|---|---|---|---|---|---|---|---|---|---|---|---|---|---|---|---|---|---|---|---|---|---|---|---|---|---|---|---|---|---|---|---|---|---|---|---|---|---|---|---|---|---|---|---|---|---|
|
| 73 | |
|---|---|
| Based on 17 reviews | |
| Mega-CD, JP |
|---|
  Cover
|
Disc |
| Mega-CD, US |
|---|
  Cover
|
Disc Manual Disc (red variant) |
Technical information
- Main article: Popful Mail/Technical information.
External links
- Sega of America webpage: Mega CD
References
 NEC Retro has more information related to Popful Mail
|
- ↑ File:PopfulMail MCD JP Box Back.jpg
- ↑ 2.0 2.1 https://sega.jp/history/hard/mega-cd/software.html (Wayback Machine: 2020-06-22 19:24)
- ↑ http://www.workingdesigns.com/museum/sega_cd/ourgames/index.html (Wayback Machine: 2002-08-13 22:47)
- ↑ https://groups.google.com/g/rec.games.video.sega/c/f_fUwhqm-XM/m/V8mZ2pGHOIYJ
- ↑ https://groups.google.com/g/rec.games.video.sega/c/102pIVDJATg/m/jyr3_OlBge4J
- ↑ File:PopfulMail_MCD_JP_SSEnding.pdf
- ↑ File:Popful Mail MCD US credits.pdf
- ↑ VideoGames, "January 1995" (US; 199x-xx-xx), page 11
- ↑ Game Players, "Vol. 8 No. 2 February 1995" (US; 1995-0x-xx), page 51
- ↑ Sega Visions, "February/March 1995" (US; 199x-xx-xx), page 49
- ↑ GamePro, "March 1995" (US; 1995-xx-xx), page 97
- ↑ GamePro, "April 1995" (US; 1995-xx-xx), page 91
- ↑ Beep! MegaDrive, "April 1994" (JP; 1994-03-08), page 23
- ↑ Electronic Gaming Monthly, "March 1995" (US; 1995-0x-xx), page 36
- ↑ Famitsu, "" (JP; 1994-03-25), page 1
- ↑ Freak, "5/95" (IL; 1995-xx-xx), page 1
- ↑ Game Players, "Vol. 8 No. 2 February 1995" (US; 1995-0x-xx), page 50
- ↑ GamePro, "April 1995" (US; 1995-xx-xx), page 108
- ↑ Hippon Super, "May 1994" (JP; 1994-04-03), page 49
- ↑ MAN!AC, "04/95" (DE; 1995-03-08), page 33
- ↑ Mega Fun, "05/95" (DE; 1995-04-19), page 70
- ↑ Mega Play, "February/March 1995" (US; 1995-0x-xx), page 48
- ↑ Next Generation, "February 1995" (US; 1995-01-24), page 101
- ↑ Sega Pro, "May 1995" (UK; 1995-04-13), page 86
- ↑ Sega Opisaniy i sekretov, "14000 Opisaniy i sekretov" (RU; 2003-03-11), page 137
- ↑ Sega Saturn Magazine, "September 1995" (JP; 1995-08-08), page 85
- ↑ Tricks 16 bit, "Tricks Sega Gold 800 igr" (RU; 1998-03-20), page 305
- ↑ Video Games, "8/94" (DE; 1994-07-27), page 83
- ↑ VideoGames, "April 1995" (US; 1995-0x-xx), page 75
| Popful Mail | |
|---|---|
|
Main page | Comparisons | Maps | Hidden content | Magazine articles | Reception | Technical information
| |